
Understanding Mini Split AC Systems
What is a Mini Split AC?
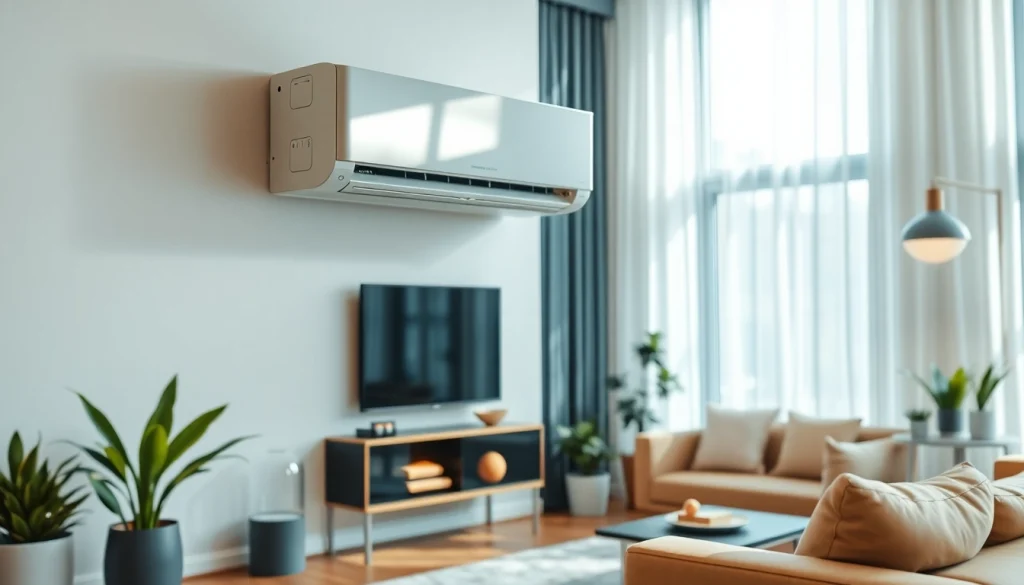
A mini split AC, also known as a ductless mini-split system, is a type of air conditioning system that provides both heating and cooling to specific areas of a building. Unlike traditional HVAC systems that rely on ducts to distribute conditioned air, mini splits operate through individual air handlers mounted in each room or zone. This design allows for more flexibility in controlling temperatures and can significantly reduce energy costs. The system consists of an outdoor compressor unit and one or more indoor air handling units that connect via refrigerant lines. The mini split ac system is particularly popular in residential areas where ductwork installation may be impractical or expensive.
Key Components of Mini Split AC
Understanding the key components of a mini split AC system is essential for effective use and maintenance. The primary components include:
- Outdoor Unit: Houses the compressor, condenser coil, and fan. It dissipates heat absorbed from the indoor unit.
- Indoor Unit: Contains the evaporator coil and fan. It cools or heats the air before distributing it in the space.
- Refrigerant Lines: Copper tubing connects the indoor and outdoor units. These lines transport refrigerant between the two units.
- Electrical Components: Power supply and control wiring are essential for unit operation and communications between indoor and outdoor units.
- Remote Control or Thermostat: Allows for easy temperature and settings adjustments from anywhere in the room.
Benefits of Choosing Mini Split AC
Opting for a mini split AC system provides numerous benefits, particularly in terms of comfort, efficiency, and installation. Some of the key advantages include:
- Energy Efficiency: Mini splits typically have higher seasonal energy efficiency ratios (SEER) compared to traditional systems, leading to lower utility bills.
- Zoned Cooling and Heating: Individual control over each room’s temperature allows for customized comfort based on personal preferences.
- Easy Installation: Without the need for ductwork, installation can be quicker and less invasive.
- Quiet Operation: Mini split systems operate quietly, making them ideal for bedrooms or shared spaces.
- Improved Indoor Air Quality: Many models come with advanced air filtration options that can reduce allergens and improve air quality.
Installation Guide for Mini Split AC
Pre-Installation Considerations
Before installing a mini split AC system, it is crucial to consider a few factors to ensure optimal performance and efficiency:
- Sizing: Correct sizing is essential for optimal performance. Calculate the cooling load using a Manual J calculation to determine BTU requirements for your space.
- Location: Choose locations for both indoor and outdoor units that allow optimal airflow. The indoor unit should be placed away from obstructions and direct sunlight.
- Electrical Requirements: Ensure the installation site has the necessary electrical wiring and circuits to support the mini split system.
- Mounting Type: Decide whether wall-mounted, ceiling-mounted, or floor-mounted units are best suited for your space.
Steps for a Successful Installation
Installing a mini split AC can generally be completed in several key steps:
- Install the Outdoor Unit: Place the outdoor unit on a stable, level surface, typically on a concrete pad or bracket. Ensure adequate clearance for airflow.
- Install the Indoor Unit: Mount the indoor unit on the wall, ensuring it is level and positioned correctly for optimal airflow.
- Drill a Hole for Refrigerant Lines: Drill a small hole through the wall to allow access for the refrigerant lines and draining pipe.
- Connect Refrigerant Lines: Carefully connect the refrigerant lines from the indoor unit to the outdoor unit, making sure to use proper fittings.
- Electrical Connections: Connect power and control wiring between the units, following local electrical codes, and manufacturers’ manuals.
- Final Check: Before starting the system, perform a thorough check of all connections for leaks and tightness. Ensure the system is charged properly with refrigerant.
- Test the System: Power on the mini split AC, ensure it operates correctly, and adjust settings using the remote control.
Common Installation Mistakes to Avoid
To ensure a successful installation and avoid potential problems, here are common mistakes to avoid:
- Incorrect Sizing: Failing to size the system correctly can lead to inefficiency or inadequate cooling and heating.
- Poor Unit Location: Installing units in areas with obstructions or direct sunlight can reduce efficiency and performance.
- Neglecting Electrical Needs: Not ensuring adequate electrical supply can lead to system failures and void warranties.
- Improper Refrigerant Lines Setup: Allowing kinks or bends in the refrigerant lines can cause leaks and performance issues.
- Skipping Testing: Not performing tests after installation can result in undetected issues that affect long-term efficiency.
Energy Efficiency of Mini Split AC
Understanding SEER Ratings
Seasonal Energy Efficiency Ratio (SEER) is a crucial metric for gauging the energy efficiency of mini split AC systems. The SEER rating is a measure of cooling output during a typical cooling season divided by the energy consumed in watt-hours. Higher SEER ratings indicate higher efficiency, which translates to lower energy costs. Most modern mini split systems have SEER ratings ranging from 16 to over 30, allowing homeowners to select models that fit their efficiency requirements and budget.
Comparing Mini Split AC to Traditional Systems
When comparing mini split AC systems to traditional HVAC systems, several factors come into play:
- Efficiency: Mini splits generally exhibit higher efficiency rates due to their lack of ductwork, which can lose a significant amount of cooled or heated air.
- Installation: Traditional systems require extensive ductwork, while mini splits can be installed in a fraction of the time with less disruption.
- Cost: While mini split systems may have a higher upfront cost, the long-term energy savings can offset initial expenses.
- Control: Mini splits allow for zone control, enabling tailored temperature settings in different rooms which traditional systems do not offer.
How to Maximize Energy Savings
To maximize energy savings while using a mini split AC, consider the following tips:
- Regular Maintenance: Schedule regular professional maintenance to ensure efficient operation. Clean or replace filters monthly and have annual check-ups for optimal performance.
- Use Programmable Thermostats: Utilize programmable or smart thermostats to manage temperature settings efficiently based on your schedule.
- Seal and Insulate Spaces: Ensure that doors and windows are well-sealed and insulated to prevent energy loss.
- Optimize Airflow: Ensure there are no obstructions around indoor units to improve airflow and efficiency.
- Consider Solar Screens: In sunny areas, installing solar screens or window treatments can minimize heat gain.
Maintaining Your Mini Split AC
Regular Maintenance Tips
Proper maintenance is vital to keeping your mini split AC in peak condition. Here are essential maintenance tips:
- Filter Cleaning: Check and clean filters every month to ensure unobstructed airflow and efficient performance.
- Coil Cleaning: Clean the evaporator and condenser coils annually to prevent dirt buildup that could impair efficiency.
- Drain Line Maintenance: Inspect the condensate drain for clogs and clean it regularly to prevent water damage or leaks.
- Check for Rust: Inspect the outdoor unit for rust or corrosion, especially if it’s near coastal areas with salt exposure.
- Annual Professional Service: Schedule annual maintenance with a qualified technician to assess refrigerant levels and overall system health.
Signs Your Mini Split AC Needs Servicing
It’s crucial to recognize when your mini split AC needs servicing to prevent major breakdowns. Common signs include:
- Unusual Noises: Grinding, squealing, or rattling noises can indicate mechanical problems.
- Poor Airflow: If airflow diminishes, it may be due to blocked filters or damaged fans.
- Ice Buildup: Ice forming on the coils is a sign of airflow issues or refrigerant leaks.
- Increased Energy Bills: Significant spikes in energy bills could suggest that your system is working harder than it should.
- Frequent Cycling: If the system turns on and off frequently, it might indicate an efficiency issue or sizing problem.
DIY Maintenance Vs Professional Service
While some maintenance tasks can be performed DIY, others require professional expertise:
- DIY Maintenance: Homeowners can clean or replace filters, check for obstructions, and clear the condensate drain.
- Professional Service: Tasks like refrigerant checks, electrical inspections, and thorough coil cleaning require professional knowledge and should be done annually.
- Cost Implications: While DIY maintenance can save money, neglecting professional servicing could lead to costly repairs down the line.
Frequently Asked Questions
What is the average lifespan of a mini split ac?
The average lifespan of a mini split AC is typically 15 to 20 years, depending on usage and maintenance. Regular upkeep can extend its lifespan.
Can a mini split ac heat and cool a room?
Yes, many mini split AC systems are designed to provide both heating and cooling, making them versatile for year-round comfort.
Are mini split ac systems easy to install?
Yes, mini split AC systems are generally easier to install than traditional systems, often requiring less invasive setup with no ductwork.
How much noise does a mini split ac make?
Mini split AC units are known for their quiet operation, typically producing between 19 to 50 decibels, which is comparable to a whisper.
What size mini split ac system do I need?
The size of a mini split AC system is determined by the BTU requirements of your space. A professional calculation is recommended for accuracy.